Do you want to live a more sustainable lifestyle and make a positive impact on the environment while also saving money? It all starts with everyday habits. From using public transportation to conserving water, there are easy actions that anyone can take to start living sustainably right away! In this blog post we’ll be discussing 21 of these simple habits – from small changes like switching off appliances when not in use to bigger steps such as investing in solar energy or energy-saving lamps. Today’s individual actions have the potential to create tremendous impacts towards social justice and environmental sustainability in the future. It is possible for us all to do our part by implementing practical and sustainable lifestyle habits that nurture Mother Nature. So if you’re ready to kickstart your journey towards sustainability, let’s get started!
21 Sustainable Lifestyle Habits
1. Reduce your food waste – plan ahead and buy only what you will use
If you’re trying to reduce your food waste, one of the best things you can do is to plan ahead and only buy what you know you’ll use. It’s tempting to buy in bulk or stock up on deals, but oftentimes we end up throwing away a ton of food that goes bad before we can eat it. So next time you’re at the grocery store, take a moment to think about what you really need and how much of it you’ll realistically eat within the next few days or week. Your wallet (and the planet) will thank you!
2. Invest in reusable containers for food storage and travel
Are you tired of constantly throwing away empty plastic containers from your packed lunches? Or maybe you’re always worried about finding a leaky, disposable container in your travel bag? Investing in reusable containers for food storage and travel might just be the solution you need. Not only is it an environmentally friendly choice, but it saves you money in the long run since you won’t have to constantly replace plastic containers. Plus, many reusable containers these days come in stylish designs and colors, making your meals on-the-go even more fun and enjoyable. So next time you pack a lunch or plan a trip, consider the benefits of investing in some durable and reliable reusable containers.
3. Shop for second-hand items to reduce your carbon footprint
Are you looking to reduce your carbon footprint and make more sustainable choices? Well, shopping for second-hand items is a great way to start! Not only are you helping to reduce waste and save resources, but you can also find unique and affordable items that are not typically found in stores. Whether you’re searching for clothing, furniture, or electronics, there are many online marketplaces and local thrift stores where you can find exactly what you’re looking for. So why not give it a try and shop second-hand? You might just be surprised at what you can find while also making a positive impact on the environment.
4. Buy local produce so you know where your food comes from
Have you ever thought about buying local produce? It’s a great way to support your community and get fresh, tasty food. Plus, you’ll know exactly where your food is coming from – no more wondering about the origin of your fruits and veggies. By buying local, you’ll also be reducing your carbon footprint, since your food won’t have to travel as far to get to you. And on top of all that, local produce is often more affordable than the imported stuff. So why not give it a try? You might be surprised at just how much you enjoy those local tomatoes or cucumbers. Happy eating!
5. Make a conscious effort to purchase items with minimal packaging
Have you ever noticed how much unnecessary packaging is used when you buy everyday items? It’s crazy, right? From plastic wrap to outer boxes, it seems like everything we buy comes with a surplus of packaging that just gets thrown away. That’s why it’s important to make a conscious effort to purchase items with minimal packaging. Not only will this help reduce waste, but it can also save you money in the long run. Plus, you’ll be doing your part to help the environment. So why not make a small change in your shopping habits and start choosing products with minimal packaging? Trust me, it’s a small change that can make a big impact.
6. Turn off lights and electronics when they’re not in use
Let’s chat real quick about something that we all know we should be doing but sometimes forget: turning off lights and electronics when they’re not in use. Sure, it may seem like a small thing that doesn’t make much of a difference, but did you know that leaving electronics plugged in when you’re not using them can still use up to 25 percent of the energy they would use when you actually are using them? Crazy, right? Plus, it can save you some serious money on your power bills in the long run. So, next time you step out of the room or finish using a device, be sure to give that switch a quick flick. Your wallet (and the planet) will thank you!
7. Conserving Water
We all know that conserving water is important for the environment, but did you know that it can also save you some serious cash? That’s right, by reducing your water consumption each day – through things like taking shorter showers and turning off the tap while brushing your teeth – you can cut down on your utility costs significantly. Plus , you’ll be helping the planet too! So why not make a conscious effort to conserve water whenever possible? It’s a small step that can go a long way.
8. Invest in Quality Products
Look no further than investing in quality products that are built to last! Quality items not only provide superior performance, but they also reduce the amount of waste generated from lower-quality disposable items. Not only that, but investing in better products can save you money in the long run since they will last much longer than their cheaper counterparts. So why not make a conscious effort to invest in quality products and make a positive impact on the environment?
9. Choose Reusable Over Disposable
We all know that reducing waste is important for the environment, so why not choose reusable over disposable items wherever possible? From grocery bags to water bottles, choosing a reusable version of something that would normally be disposable can help you save money and reduce your impact on the planet. Plus, most reusable products are made from quality materials that will last for years, meaning you’ll get your money’s worth in no time!
10. Solar Panels
Are you looking for an easy way to reduce your power bills and help the environment? Look no further than solar panels! By investing in a quality set of solar panels, you can generate your own free electricity from the sun. Not only that, but it’s possible to even make some money off selling excess energy back to the grid. So why not make a small change and invest in solar panels? Trust me, it’s an investment that will pay dividends for years to come. We love having ours on our house, the energy bill is so low each month and we feel good about saving the environment! If you are in the market, make sure to visit Volt Solar because we loved working with them on our home!
11. Energy Efficient Appliances
Let’s talk real quick about energy efficient appliances. By investing in energy efficient models, you can reduce your power bills significantly! Plus, you’ll be doing your part to help the environment too. Not only that, but many energy efficient appliances come with a variety of features that standard models may not have – such as temperature sensors and timers – making them even more appealing.
12. Carpool
Are you looking for an easy way to reduce your carbon footprint while also having some fun? Look no further than carpooling! Not only will it help you save money on gas and reduce your environmental impact, but it can also be a great way to socialize with friends and colleagues. So why not make a conscious effort to carpool whenever possible? It’s a small step that can make a huge difference!
13. Composting
Did you know that composting is an excellent way to reduce your environmental impact? Not only will it help to reduce the amount of waste sent to landfills, but composting can also provide a great source of organic fertilizer for your garden. Plus, you could even sell your compost and make some extra cash!
14. Using Natural Cleaning Products
Are you looking for an easy way to help the planet and save money? Look no further than using natural cleaning products! Not only will they be gentle on your skin, but they’re also much better for the environment. Plus, many of them are cheaper than standard chemical-based cleaners too! Some of our favorite brands include doTERRA, Mrs. Meyer’s, Zevo for flying insects that Polite Pest doesn’t always get with their chemical free bug spray.
15. Spending your Money Wisely
Let’s talk about spending your money wisely. By making conscious choices when it comes to where you put your hard-earned cash, you can help to support businesses that prioritize the environment and sustainability. Plus, look out for companies that offer eco-friendly products too – they’re always a great choice!
16. Practicing Reduce, Reusing, and Recycling
One of the most important tips for helping the environment – practicing reduce, reuse, and recycle. By implementing these three R’s in your daily life, you can make a huge difference to the planet. So why not make a conscious effort to incorporate them into your lifestyle? After all, every small step counts!
17. Reduce Animal Product Consumption
Finally, let’s talk about reducing animal product consumption. Not only will it help to reduce your environmental footprint, but it can also be an excellent way to improve your health and wellbeing too. So why not make a conscious effort to reduce the amount of animal products you consume? Trust me – you won’t regret it!
18. Air Dry your Clothes
Another easy way to reduce your environmental impact is by air drying your clothes. This simple yet effective technique can help you save money on energy bills while also reducing the amount of energy used in the laundry process. Plus, it’s much better for the environment too! So why not give it a try?
19. Install Low-Flow Showerheads
Are you looking for an easy way to help the environment? Look no further than installing low-flow showerheads! Not only will they help to reduce your water consumption, but they can also significantly reduce your water bills. Plus, many of them come with a variety of features such as temperature sensors and timers – making them even more appealing!
20. Choose Eco-Friendly Building Materials
Why not make a conscious effort to choose eco-friendly building materials when renovating or constructing? Not only will it help you save money on energy bills, but it can also reduce your environmental impact too. Plus, many of these materials come with a variety of features – such as temperature sensors, energy-saving coatings, and much more – making them even more appealing!
21. Opt for Slow Fashion
Finally, let’s talk about slow fashion. Not only will it help you save money in the long run, but it can also be an excellent way to reduce your environmental impact too. By opting for eco-friendly materials and sustainable production processes, you’ll be making a huge difference to the planet. Places to avoid with fast fashion include: Asos, Chicwish, Zara, H&M, GAP, Forever 21, Topshop, Esprit, Fashion Nova, and even more mainstream brands like Adidas, Nike, and Walmart.
Living sustainably may seem daunting at first, but the truth is it only takes a few small steps to make a big difference. If you commit to reducing your food waste, investing in reusable containers, shopping second-hand items, buying local produce, and seeking out minimal packaging items when possible – you will be well on your way to living a more sustainable lifestyle. Additionally, being mindful about turning off lights and electronics when they’re not being used will only support your journey. Remember: no one is perfect. You can always challenge yourself to do better and do more as you become aware of new ways to help the environment. Small changes add up over time, so anytime you make an effort – however seemingly small – to reduce your environmental impact is a step in the right direction!
We’ve all had bad days where our home offices look like an entire case of paper exploded all over the place. In my office, I call those days “the day before quarterly taxes are due.” All joking aside, I’ve spent most of the last year dedicated to making my home office a more green and sustainable space. I’ve really wanted to focus on going green. So, I’ve put together the steps I took to reduce my own carbon footprint as I made my home office greener.
How to Make Your Home Office More Green
Unplug and Switch Off
Working from home has its perks, like being able to roll out of bed and straight into your office (aka the kitchen table). But did you know that even when your devices are in sleep mode or turned off, they’re still sucking up energy? It’s like they never learned the concept of personal space! So, let’s give them a timeout and unplug them when you’re not using them. It’s a simple way to reduce energy consumption and save some money on your electricity bill. Plus, it’s a great excuse to do a victory dance every time you successfully unplug something without accidentally pulling out the wrong cord (we’ve all been there).
Reduced Paper Usage
Reducing paper usage is usually the first thing people think of when they think of going green in their home office. No matter which invoice system you’re using, you should be able to save your invoices to your computer or the cloud instead of printing them. If you’re a fan of white papers and other downloadable content like I am, leave it on your computer and read it there, or move it onto a tablet so you can read it from the couch instead of printing it out.
Move client files that aren’t sensitive to Google Docs. If you need to store sensitive data, make sure that you’re using a certified encrypted method. Switch from a paper planner to an online calendar; Google Calendar can do just about anything these days, and you can sync it to Trello or Asana so you can keep track of important meetings and deadlines. You really can go paper-free.
Opt for Energy-Efficient Lighting
Staring at your computer screen all day can make you feel like a vampire avoiding sunlight, but that doesn’t mean you have to settle for a dreary office environment. Say goodbye to those old incandescent light bulbs and hello to energy-efficient lighting options. LED lights are not only more eco-friendly but also last longer, which means fewer trips to the store for replacements. And if you’re really feeling fancy, you can even get smart light bulbs that you can control with your voice or your phone (cue the “I’m living in the future” dance). So, let’s shed some light on your eco-friendly home office and reduce your energy consumption, one bulb at a time!
Used an Eco-Friendly Printer
For some businesses, using a printer can’t be avoided. If that’s the case for you, choose a more eco-friendly printer. I recommend the Epson EcoTank Wireless Color All-In-One. EcoTank printers use less expensive ink than cartridges, and the bottles are better for the environment. The super tank bottles have as much ink as up to eighty cartridges; that’s a lot of landfill space you’re saving! Printworks sells reams of 100% recycled paper so that when you’re printing documents, you’re reducing your use of new paper, too!
Shop the Thrift Store
When it comes to furnishing your green home office, the thrift store can be your best friend! You can often find some incredible deals on office furniture at the neighborhood thrift. When I needed a new filing cabinet, I was able to find a like-new one, with a working lock, for a few bucks. If you’re looking for an office chair, make sure you test your find out before leaving the thrift store. It’s an unpleasant surprise if you find that the chair has been spun so often it won’t stay attached to the base!
Use Smart Power Strips
You know that feeling when your computer, monitor, printer, and who knows what else are all plugged into one power strip, and you break into a cold sweat wondering if they’re silently plotting against you? Yeah, we’ve been there too. But fear not, because smart power strips are here to save the day (and potentially your sanity). These nifty little devices are like the bouncers at the club, monitoring your energy consumption and cutting off power to devices that are just hanging around, being energy vampires. So, say goodbye to unnecessary energy waste and hello to a power strip that’s smarter than your average bear (or vampire, for that matter).
Buy Recycled
You also have some options if you want to buy recycled. Office mats, which keep you from damaging your carpet or laminate floor, are easily found with recycled options. Cube bookcases are great for storing books or other essentials. Durable plastic notebooks can be made from recycled materials, too! For a while there, every time I hit the office supply store, I would cruise through the aisles for stuff I knew I would be purchasing soon so I could price out recycled options; sometimes I would find recycled products I didn’t even know existed!
Embrace Natural Lighting
Who needs a fancy ergonomic chair when you can have the warmth of the sun as your office buddy? Embracing natural lighting not only gives your workspace a fresh and inviting feel but also helps reduce your reliance on artificial lighting. So, open those curtains wide and let the sun work its magic on your productivity levels. Just make sure you don’t blind yourself with the glare on your computer screen, or you’ll look like you discovered a secret talent for impersonating a zombie. Natural lighting is the eco-friendly way to light up your office while also giving you a healthy dose of vitamin D. It’s a win-win!
Stay Organized
It sounds strange to tell you that staying organized is part of going green. But I’m going to tell you why. Whenever we let our offices get cluttered with stuff, our first instinct is to buy more stuff to get it uncluttered. The truth is, we usually don’t need more stuff to get it uncluttered; we just need to put everything away in the first place. Once you get your green office set up, keep it tidy.
Add some time to clean your office into your schedule every week, and plan to do a deep cleaning once a quarter. Move everything around and vacuum, wash the windows, and organize your bookshelves, and the whole lot. If you stay organized, you won’t need to buy more stuff. But if you do, for some reason, need to replace something, make sure that you recycle it if it’s at all possible, so that you keep the green cycle going.
Plant Some Actual Greenery
If your home office is feeling a little too stale, it’s time to bring in some actual greenery. No, we’re not talking about those fake plants that collect dust faster than you can say “décor disaster.” We mean real, living plants that not only improve the air quality in your workspace but also add a touch of life and personality. Just make sure you’re not accidentally turning your office into a jungle with plants growing out of every corner. A balanced amount of greenery will give your eco-friendly home office a fresh and vibrant vibe. Plus, if you forget to water them, just blame it on being too focused on saving the planet.
Go green in your home office by taking these simple steps today!
Going green is one of those investments that you will pay more for initially, but that you will thank yourself for in the long run. Ultimately, it will pay off, and you’ll appreciate the changes you made further down the line. I can also tell you I feel more productive and have a clearer head space to accomplish things when it’s organized than when it’s not organized.
There are several ways to make your home office more green. Working remotely means you can ditch the commute and work from the comfort of your own home. To make your office more eco-friendly, start by replacing incandescent bulbs with LED lights. You can also take advantage of natural light by opening blinds and curtains during the day. If you need to use additional lighting, look for energy-efficient options.
Another way to reduce your environmental impact is to choose environmentally friendly office supplies, like refillable pens and recycled paper. If you are going to head out of the office, use a reusable bottle which you can also use in the office day to day to help you get your daily water quota. Finally, be mindful of your energy usage. When you’re not working, power down electronics and unplug them from the power strip. Taking these steps will help to make your office more green and sustainable.
The Thanksgiving holiday is a time to come together with family and friends to celebrate all that we are grateful for. It is also a time for festive decorations! If you are looking for some ideas on how to decorate your home for Thanksgiving, you have come to the right place. In this blog post, we will discuss a variety of different ways that you can deck out your house in celebration of the holiday. From traditional decor to more modern ideas, we have something for everyone! So sit down, get comfortable, and let’s get started!
Thanksgiving Day Decor Ideas
Traditional Thanksgiving Decor
Looking to add a touch of festivity to your home this Thanksgiving? Then look no further than your backyard! With an abundance of fall fruits and vegetables, it’s easy to create beautiful Thanksgiving centerpieces, tablescapes, and door decorations that will make your home feel warm and inviting.
Start by gathering some fall fruits and vegetables like pumpkins, squash, and gourds. You can display them on your front porch or in your entryway as a colorful and welcoming addition to your decor. Then, bring the harvest inside by using hay bales, corn stalks, and branches to create stunning Thanksgiving centerpieces for your dinner table. For a truly unique tablescape, try using a charcuterie board as your base. Simply arrange fall fruits and vegetables, along with some meats and cheeses, on a large cutting board or serving platter. Finish off your Thanksgiving Day decor by making a DIY wreath for your front door. All you need is some fall foliage, a bit of twine, and some creativity! Whatever you do, there’s no shortage of ways to add a festive touch to your home this Thanksgiving.
Rustic and Natural Thanksgiving Decor
One way to get into the Thanksgiving spirit is to decorate your home with seasonal items like pumpkins, squash, hay, and cornucopia. You can use these items to create Thanksgiving centerpieces, fall wreaths, tablescapes, and charcuterie boards. Another great way to decorate for Thanksgiving is to use natural elements like leaves, branches, and berries. You can use these items to create door wreaths, mantel decorations, and table runners. By incorporating some simple tips and ideas, you can easily transform your home into a stylish and welcoming space for holiday gatherings.
Cozy Thanksgiving Decor
When the chilly autumn breeze starts blowing and the leaves turn vibrant shades of red and orange, it’s time to cozy up your dining room for Thanksgiving. Get ready to create a warm and inviting atmosphere that will make your guests feel right at home. Picture soft throw blankets draped over chairs, plush pillows scattered around the room, and a crackling fireplace casting a gentle glow.
And don’t forget about the essential element – a delectable Thanksgiving menu that warms both the heart and the belly. With cozy Thanksgiving decor, your dining room will become a snug haven for friends and family to gather, eat, and create memories.
Nature-Inspired Thanksgiving Decor
Are you tired of the same old Thanksgiving decorations year after year? Shake things up this turkey day with some eye-catching nature-inspired decor! Imagine transforming your dining room into a cozy woodland retreat, with leaves, pinecones, and branches adorning your table.
Not only will it create a stunning Thanksgiving table setting, but it will also give your guests a taste of the great outdoors while they indulge in your delicious Thanksgiving menu. This nature-inspired decor is all about bringing the beauty of the outdoors inside and adding a touch of rustic charm to your celebration.
Modern Thanksgiving Decor
When it comes to Thanksgiving Day decor, there are endless possibilities. From Thanksgiving centerpieces and fall wreaths to tablescapes and charcuterie boards, there are options for every area of the house. But how do you put the decorations together for a stylish look?
For starters, consider your color palette. What colors will you use for your decor? Will you stick to traditional fall colors like orange, red, and yellow? Or mix things up with a more modern palette of black, white, and gold? Once you’ve decided on your colors, it’s time to start shopping for decorations.
If you’re looking for Thanksgiving centerpieces, try using pumpkins as vases. Simply cut the top off of a small pumpkin and remove the seeds. Then fill the pumpkin with water and arrange your flowers inside. For a more modern twist on the traditional Thanksgiving centerpiece, use white pumpkins and artificial flowers.
Another great option for tablescapes is a charcuterie board. Arrange an assortment of fruits, vegetables, cheeses, meats, and crackers on a large cutting board or platter. Add some sprigs of rosemary or thyme for a touch of green, and you’re all set!
Elegant Thanksgiving Decor
Looking to add a touch of sophistication to your Thanksgiving festivities? Then embrace the elegance with some jaw-dropping decor! With an elegant Thanksgiving table setting, your dining room will be the talk of the town. Think luxurious linens, sparkling china, and twinkling candlelight creating a warm and inviting ambiance.
Add some eye-catching centerpieces and a tastefully arranged Thanksgiving menu, and you’ve got yourself a recipe for a truly unforgettable turkey day. So why not sprinkle a little elegance onto your Thanksgiving table this year and let your guests dine in style?
Creative and Fun Thanksgiving Decor
It’s time to let your creativity soar and infuse some fun into your Thanksgiving decor! Break free from tradition and unleash your inner artist with unique and eye-catching decorations that will have your guests talking for years to come. Think outside the box with unconventional color schemes, whimsical centerpieces, and playful table settings.
Get the whole family involved in creating handmade decorations, making it an interactive and memorable experience for everyone. This creative and fun Thanksgiving decor will ensure that your Turkey Day celebration stands out from the rest, leaving your guests impressed and inspired.
DIY Thanksgiving Decorations
As the autumn leaves begin to fall, it’s time to start thinking about Thanksgiving Day decor! Whether you’re hosting a large dinner party or a quiet family gathering, there are plenty of ways to add a festive touch to your home. For the entryway, consider placing a cornucopia filled with seasonal flowers on the doorstep. You can also line the walkway with miniature pumpkins or gourds. Inside the house, drape a Fall-themed tablecloth over the dinner table and adorn it with candles, acorns, and leaves. Fall colors like orange, yellow, and red are perfect for creating a warm and inviting atmosphere. For the living room or den, try adding a few Throw pillows in seasonal prints. And don’t forget the fireplaces! Decorate mantels with garlands of leaves or mini pumpkins. With a little bit of creativity, you can transform your home into a Thanksgiving Day feast for the eyes!
Table Settings for Thanksgiving Dinner
The dinner table is the center of any Thanksgiving feast. It’s where family and friends gather to enjoy good food and conversation. If you’re hosting Thanksgiving dinner this year, you’ll want to create a festive and inviting table setting. Here are some tips to get you started:
Choose a color scheme: Fall colors like orange, yellow, and red are always popular for Thanksgiving. You can use these colors in your tablecloth, napkins, plates, and centerpiece.
Think about texture: A variety of textures can add interest to your table setting. Pair a smooth tablecloth with linen napkins, or mix and match different patterns. Add some shine with metallic accents like candlesticks or chargers.
Create a centerpiece: The centerpiece is the focal point of your table setting. A vase of beautiful fall flowers is always a good choice. You could also go for something more creative, like a miniature pumpkin patch or a display of fall leaves. Candles are another great option for adding warmth and light to your dinner table.
With these tips in mind, you’re sure to create a dinner table that will be the talk of the holiday season!
Food Ideas for Thanksgiving Celebration
Thanksgiving is a time to give thanks and enjoy the company of family and friends. A traditional Thanksgiving feast typically includes turkey, stuffing, mashed potatoes, cranberry sauce, and pumpkin pie. However, there are many other delicious Thanksgiving recipes out there that are worth trying. Here are a few ideas to get you started:
Green Bean Casserole: This classic Thanksgiving dish is a perennial favorite. It’s easy to make and can be easily tailored to your taste.
Mashed Sweet Potatoes: Sweet potatoes are a Thanksgiving tradition in many households. They can be mashed like regular potatoes, or made into fries or casserole.
Roasted Brussels Sprouts: Brussels sprouts are not just for Thanksgiving anymore! Roasting them in the oven with some olive oil and garlic makes for a delicious and healthy side dish.
Pumpkin Soup: This creamy soup is perfect for cold fall days. It can be served as an appetizer or main course.
Apple Pie: What would Thanksgiving be without pie? Apple pie is a classic for a reason, but feel free to get creative with your pies and try new flavors.
Whatever dishes you choose to serve, Thanksgiving is sure to be a festive and memorable occasion!
No matter what your style, there are plenty of ways to add a festive touch to your home this Thanksgiving. With a little bit of creativity, you can easily create Thanksgiving centerpieces, tablescapes, door wreaths, and more that will make your holiday gathering one to remember.
Do you regret all your shopping expenses after going through your monthly bills? You heard about the concept of minimalism and tried decluttering your home for some extra cash. But even then you saw you spent too much and now you are in a financial strain for the next few months. Been there and done that?
Just so you know minimalism does not only involve decluttering your home for some extra items. Minimalism also works towards lowering your possessions in the future by shopping less, leaving you with extra money.
This does not only include suppressing your shopping instincts for trendy shoes, but also controlling your shopping requirements for almost everything, starting from clothes, to décor pieces, everything.
But if you still need a little more, I’m always ready to help. Read along.
Things To Stop Buying To Save Money
If you’re looking for a way to save some extra money, there are a few things you might want to reconsider purchasing. It might seem like small picks, but those water bottles and extra things you grab at the grocery store can add up to a lot of money over time.
Trust me, just cutting back on unnecessary items during your grocery shopping trips can save you quite a bit in the long run. Remember, every little bit counts when it comes to saving for that big purchase or that upcoming trip. Stay mindful of your spending and you’ll be golden! Here’s my list of things to stop buying to save money!
Trendy clothes
Want to buy that chic crop top just because it is so in trend these days? Well, you have to change your approach if you have to be a minimalist. Stop filling your house just to fit in, and match the vogue fashion standards.
Buy what you really like not because it is in trend. Even in that, if you already have plenty of good clothes in the closet, don’t look to buy more. The principle of minimalism dictates you be satisfied with what you already have. So be satisfied and grateful for the clothes you already have.
Cosmetics
We all have lipsticks we don’t use, yet we want a shade that looks only a little different from what we own. But this is how minimalism works; it forbids you from buying duplicate or somewhat identical stuff.
When you already have red lipstick, why would you buy another shade in the line of red? It does not matter, and you have to change this propensity to buy similar products if you are going to be a minimalist.
The same goes for other cosmetics. When you already have one cosmetic, wait till you completely consume it, only then buy a new one. Don’t accumulate cosmetics just because you think you might use them later. Just stick to one. All the more, stick to one brand; don’t buy similar products of different brands thinking they are different.
Bottled water
While being a minimalist, take a moment to think about the environment. When you keep on buying bottled water, you are creating a demand for plastic. Moreover, when you discard these bottles, you are discarding plastic which takes millions of years to decompose.
Instead, invest in a copper or metal bottle and take it everywhere you go. Keep on filling it up and you will be saving both your money and the environment. My favorite is a Hydroflask, and it withstands the Arizona heat and still keeps the water inside quite cool.
Gadgets
We live in an era where our life depends on gadgets. But that does not mean that you have to keep stuffing your home with them just because you feel the need to be technologically upgraded. If you have a phone that is working fine, don’t invest in another just because it’s the latest.
And now you don’t need the latest gadgets to keep up with anyone. If you see something you could use that would make your life easier or better, then consider it after much research.
Books (Hardcover)
If you are an avid book reader, you will most likely have a home stuffed with books, even those that you have already read. I understand books are our best friend, and reading comes packed with benefits. But think about how it adds clutter to your home.
If you want to read new books, then invest in a Kindle, or buy e-books. However, if you still bear unconditional love for paper books, then lend them from your local libraries or your friends, instead of buying them. Moreover, about the books that you already have read, consider lending them to those in need. It’s the greatest level of kindness to offer someone books.
Last but not least
When it comes to adopting a minimalist lifestyle and saving more money, it’s all about changing your perception of things and your buying habits. You don’t have to make drastic changes overnight – start small and work your way up. For example, investing in a reusable water bottle instead of constantly buying disposable ones can reduce waste and save you money in the long run.
And speaking of changing habits, re-assessing your use of credit cards can also help you stop buying to save. It’s easy to get caught up in the rewards and perks, but if you’re not paying off your balance in full each month, you may end up paying more in interest and fees than you actually benefit. The same goes for bank fees – make sure you’re using a bank that doesn’t charge exorbitant fees for everyday transactions.
Remember, it’s all about being determined and in control of your thoughts and shopping instincts. So start small, stay focused, and watch your savings grow!
It’s time to say, “Out with the cold, and in with the savings”!
As we come to the end of our journey on things to stop buying to save money, it’s clear that small changes to our spending habits can make a big difference in achieving our financial goals. Remember, it’s not about completely depriving ourselves of the things we enjoy, but rather finding ways to cut back on unnecessary expenses and redirect that money towards saving for the long haul.
By investing in a reusable water bottle and committing to meal planning, we can avoid wasting money on expensive bottled water and last-minute takeout meals. Shopping smarter at the grocery store and resisting the urge to buy items we don’t need can also free up extra cash in our budgets. Finally, ditching the use of disposable paper towels saves money and contributes to a more sustainable lifestyle.
In the end, the key to stop spending money is to be mindful of our buying decisions and intentional about the way we allocate our resources. By making small but impactful changes, we can achieve financial freedom and the peace of mind that comes with it. So go ahead, give it a try, and watch your savings grow!
Happy money-saving, my friends! Until next time, stay frugal and fabulous! Hey, are you a frugal minimalist who has limited their shopping habits? If yes, feel free to share your stories and experiences with us in the comment section.
Keeping your home clean and fresh is a top priority for every homeowner. When it comes to carpet and home cleaning, finding a reliable and efficient service provider is essential. In this blog post, we will introduce you to a local company that offers exceptional cleaning services, along with some fantastic features that make them stand out from the rest. From delightful scents to transparent pricing and convenient online scheduling, let’s explore why this company is the perfect choice for all your cleaning needs.
The Perfect Clean — Carpet and Home Cleaning Done Right!
1. The Scent:
One of the standout features of this cleaning service is the delightful scent used in their cleaning products. Instead of leaving your home with a chemical after-smell, their cleaning solutions are infused with a fragrance reminiscent of an anthropology candle. After the cleaning process is complete and your carpets or upholstery have dried, your home will be left smelling nice and fresh. Say goodbye to unpleasant odors and hello to a rejuvenated living space!
2. Price Transparency:
When it comes to pricing, this company believes in complete transparency. Their fee for coming out to your home is a base of $180, which covers cleaning three areas, regardless of their size. This upfront pricing model ensures that you know exactly what to expect, with no hidden fees or surprises. If you require additional cleaning in extra areas or specific items, such as grout lines, upholstery, couches, or even post-construction cleaning, the cost is a reasonable $60 per item. This straightforward pricing structure allows you to plan and budget effectively, knowing that there won’t be any unexpected costs.
3. Online Scheduling:
Gone are the days of spending hours on the phone trying to schedule a cleaning appointment. This local company offers an easy-to-use online scheduling system that puts you in control of booking your cleaning services. Whether you need a specific date and time or prefer to choose from available slots, their online scheduler provides the convenience and flexibility you deserve. No more back-and-forth calls or waiting for a callback. With just a few clicks, you can secure a cleaning appointment that fits seamlessly into your busy schedule.
I recently had the pleasure of using this company’s services, and I couldn’t be happier with the results. After construction work, my tile floor needed a thorough cleaning, and they did an exceptional job. Not only that, but they also managed to revive two rugs that were damaged in the rain, making them usable again. As if that wasn’t enough, they even took care of a stubborn spot in my car that I couldn’t get rid of. The end result was astonishing — everything looked as good as new!
When it comes to carpet and home cleaning, finding the perfect combination of quality, reliability, and affordability can be challenging. However, this local company ticks all the boxes. With their refreshing scents, transparent pricing, and convenient online scheduling, they offer an exceptional service that leaves your home looking and smelling fantastic. Whether you need your carpets, upholstery, grout lines, or entire rooms cleaned, they have you covered. Experience the difference of a professional cleaning service that goes above and beyond to exceed your expectations. Say hello to The Perfect Clean!
They aren’t just for residential or personal homes. They also can clean Short Term Rentals, AirBnB’s, Commercial spaces including office buildings. Don’t forget about The Perfect Clean for the holidays too!
Your living space reflects your personality and plays a significant role in setting the mood and atmosphere of your home. Sometimes, however, you might find yourself craving a change—a different vibe that better aligns with your current tastes and preferences. The good news is that transforming your space to suit a new aesthetic doesn’t have to break the bank. In this article, we will explore five easy and affordable ways to change your space on a budget for a fresh look and create a different vibe.
5 Easy Ways to Change Your Space on a Budget to Fit a Different Vibe
1. Change the Paint Color:
One of the most effective and inexpensive ways to transform any space is by changing the paint color. Paint has the power to completely alter the ambiance of a room, making it feel vibrant, cozy, or sophisticated. When selecting a new color, consider the atmosphere you want to create. Warm tones like terracotta or mustard yellow can add a cozy and inviting feel. While cool blues or greens can provide a refreshing and calming effect. Opting for neutral shades like beige or gray allows for versatility and provides a backdrop for accentuating other elements in the room.
2. Create a Feature Wall with Paint or Wallpaper:
If you want to make a bold statement without committing to changing the entire room, creating a feature wall is an excellent option. This technique involves highlighting a single wall with a different paint color. Or using wallpaper to add texture, pattern, or even a mural. A feature wall can instantly transform the look and feel of a space, becoming a focal point that adds character and personality. Choose a wall that naturally draws attention. Such as the one behind a bed, sofa, or fireplace, and let your creativity run wild.
3. Clutter Clear the Space and Donate Decor and Things That No Longer Feel Right:
To create a new vibe, it’s important to declutter your space and let go of items that no longer align with your desired aesthetic. Start by evaluating your belongings and consider donating or selling items that you no longer need or resonate with. This step not only helps you clear physical clutter but also declutters your mind, allowing you to focus on the new vibe you want to create. By letting go of unnecessary items, you’ll have more space to curate a cohesive and intentional aesthetic.
4. Move the Furniture Around or Take Out Items That No Longer Fit the Feel of the Space:
Sometimes, all it takes is a fresh arrangement of furniture to completely transform the energy of a room. Experiment with different layouts and positions to create a better flow and maximize the functionality of your space. If certain furniture pieces no longer fit the feel you’re trying to achieve, consider repurposing them in other rooms or donating them to someone who will appreciate them. Removing unnecessary items can breathe new life into a space. And make room for new additions that align with your desired vibe.
5. Incorporate Affordable Accessories and Statement Pieces:
Once you’ve made the foundational changes to your space, it’s time to add the finishing touches. Accessories and statement pieces can make a significant impact on the overall vibe of a room without breaking the bank. Look for affordable options like decorative pillows, rugs, curtains, artwork, or plants that complement your desired aesthetic. These small additions can inject personality and create the desired ambiance, tying the entire room together.
Transforming your space to fit a different vibe doesn’t have to be a costly endeavor. By implementing these five easy and affordable tips, you can breathe new life into your living space without emptying your wallet. Whether you choose to change the paint color, create a feature wall, declutter, rearrange furniture, or add accessories, remember that the goal is to create an environment that aligns with your current tastes and preferences. Let your creativity flow, and enjoy the process of transformingyour space into a haven that truly reflects your unique style and personality.


 are you helping to reduce waste and save resources, but you can also find unique and affordable items that are not typically found in stores. Whether you’re searching for clothing, furniture, or electronics, there are many online marketplaces and local thrift stores where you can find exactly what you’re looking for. So why not give it a try and shop second-hand? You might just be surprised at what you can find while also making a positive impact on the environment.
 your water consumption each day – through things like taking shorter showers and turning off the tap while brushing your teeth – you can cut down on your utility costs significantly. Plus , you’ll be helping the planet too! So why not make a conscious effort to conserve water whenever possible? It’s a small step that can go a long way.
 money on gas and reduce your environmental impact, but it can also be a great way to socialize with friends and colleagues. So why not make a conscious effort to carpool whenever possible? It’s a small step that can make a huge difference!
 regret it!
 impact too. By opting for eco-friendly materials and sustainable production processes, you’ll be making a huge difference to the planet. Places to avoid with fast fashion include: Asos, Chicwish, Zara, H&M, GAP, Forever 21, Topshop, Esprit, Fashion Nova, and even more mainstream brands like Adidas, Nike, and Walmart.
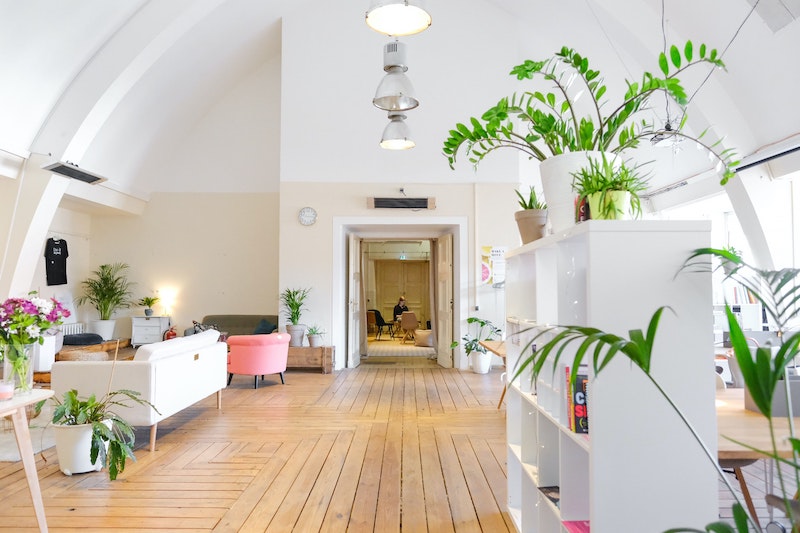


 Who needs a fancy ergonomic chair when you can have the warmth of the sun as your office buddy? Embracing natural lighting not only gives your workspace a fresh and inviting feel but also helps reduce your reliance on artificial lighting. So, open those curtains wide and let the sun work its magic on your productivity levels. Just make sure you don’t blind yourself with the glare on your computer screen, or you’ll look like you discovered a secret talent for impersonating a zombie. Natural lighting is the eco-friendly way to light up your office while also giving you a healthy dose of vitamin D. It’s a win-win!
 It sounds strange to tell you that staying organized is part of going green. But I’m going to tell you why. Whenever we let our offices get cluttered with stuff, our first instinct is to buy more stuff to get it uncluttered. The truth is, we usually don’t need more stuff to get it uncluttered; we just need to put everything away in the first place. Once you get your green office set up, keep it tidy.
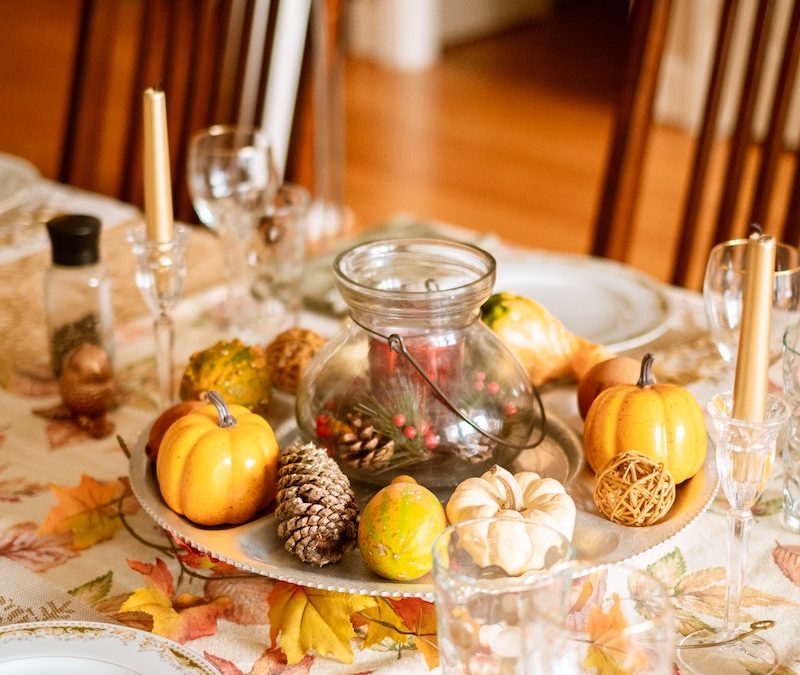
 One way to get into the Thanksgiving spirit is to decorate your home with seasonal items like pumpkins, squash, hay, and cornucopia. You can use these items to create Thanksgiving centerpieces, fall wreaths, tablescapes, and charcuterie boards. Another great way to decorate for Thanksgiving is to use natural elements like leaves, branches, and berries. You can use these items to create door wreaths, mantel decorations, and table runners. By incorporating some simple tips and ideas, you can easily transform your home into a stylish and welcoming space for holiday gatherings.
 When it comes to Thanksgiving Day decor, there are endless possibilities. From Thanksgiving centerpieces and fall wreaths to tablescapes and charcuterie boards, there are options for every area of the house. But how do you put the decorations together for a stylish look?
 As the autumn leaves begin to fall, it’s time to start thinking about Thanksgiving Day decor! Whether you’re hosting a large dinner party or a quiet family gathering, there are plenty of ways to add a festive touch to your home. For the entryway, consider placing a cornucopia filled with seasonal flowers on the doorstep. You can also line the walkway with miniature pumpkins or gourds. Inside the house, drape a Fall-themed tablecloth over the dinner table and adorn it with candles, acorns, and leaves. Fall colors like orange, yellow, and red are perfect for creating a warm and inviting atmosphere. For the living room or den, try adding a few Throw pillows in seasonal prints. And don’t forget the fireplaces! Decorate mantels with garlands of leaves or mini pumpkins. With a little bit of creativity, you can transform your home into a Thanksgiving Day feast for the eyes!
 The dinner table is the center of any Thanksgiving feast. It’s where family and friends gather to enjoy good food and conversation. If you’re hosting Thanksgiving dinner this year, you’ll want to create a festive and inviting table setting. Here are some tips to get you started:
 Thanksgiving is a time to give thanks and enjoy the company of family and friends. A traditional Thanksgiving feast typically includes turkey, stuffing, mashed potatoes, cranberry sauce, and pumpkin pie. However, there are many other delicious Thanksgiving recipes out there that are worth trying. Here are a few ideas to get you started:


 perfect choice for all your cleaning needs.
 per item. This straightforward pricing structure allows you to plan and budget effectively, knowing that there won’t be any unexpected costs.
 company ticks all the boxes. With their refreshing scents, transparent pricing, and convenient online scheduling, they offer an exceptional service that leaves your home looking and smelling fantastic. Whether you need your carpets, upholstery, grout lines, or entire rooms cleaned, they have you covered. Experience the difference of a professional cleaning service that goes above and beyond to exceed your expectations. Say hello to

 belongings and consider donating or selling items that you no longer need or resonate with. This step not only helps you clear physical clutter but also declutters your mind, allowing you to focus on the new vibe you want to create. By letting go of unnecessary items, you’ll have more space to curate a cohesive and intentional aesthetic.
 impact on the overall vibe of a room without breaking the bank. Look for affordable options like decorative pillows, rugs, curtains, artwork, or plants that complement your desired aesthetic. These small additions can inject personality and create the desired ambiance, tying the entire room together.
Recent Comments