6 Self-Care Ideas for Valentine’s Day

6 Self-Care Ideas for Valentine’s Day

It’s that time of the year again where everything will be all about roses, chocolates, and love. The month of February is quickly approaching and I know; you’d be busy planning your V-day.

However, how about spending this Valentine’s Day taking care of the most important person in your life? How about showering some self-love and practice self-care this V-day?

In this fast-paced life where we’re always running to meet never-ending deadlines and working super-hard to pay our bills on time; it’s challenging to find time for ourselves and relax. This V-day, it’s your chance to spend some quality time nourishing your mind and body.

If you’re wondering how you’re going to have a super peaceful Valentine’s Day this year, keep reading for I have 6 wonderful self-care ideas and tips for you.

6 self-care ideas for Valentine’s Day:

  1. Spa Night At Home

If you’re someone who enjoys spending time alone at home, this is the best way to pamper yourself. Light a candle, play some soft music, take a hot bubble bath with essential oil and apply a refreshing homemade mask. This is surely going to make you feel out of this world and you will be able to spend some quality time with yourself.

You can always look out for some online tutorials to make healthy face-masks that would nourish your skin.

  1. Disconnecting From Social Media For Mindfulness

Take a break from social media and enjoy this alone time.

We’re so busy scrolling our Instagram or Facebook feed that we hardly realize how much negatively we’re impacted by this mindless activity.

Spare some time this V-day to practice mindfulness and be actually there for yourself. Experience every single moment and be mindful of everything you do.

  1. Declutter Your Way To Happiness

Clutter in your space shows clutter in your head.

It’s indeed necessary to keep your space clean and tidy. I really don’t mean doing a deep-cleaning thing here but having a neat and refreshing space will give you a soothing feel and you’ll actually love spending time there.

Throw away everything that doesn’t serve the purpose. This is a sign of welcoming new things, creating space for better, bigger things.

  1. Move your body

How about getting some ‘feel-good’ hormones?

Endorphins appear whenever you keep your body active. This doesn’t mean that you have to practice hard-core exercise or go to the gym. You can always move your body by going on a long walk, jogging, dancing your heart out and so much more. Deep breathing exercises are also known to release endorphins and calm the body. 

Just make sure that you’re waking up those hormones and spending some time nourishing your physical health.

  1. Just say no

We have a hard time saying no to everyone. Be it a friend or a colleague or even our family members. It’s so conditioned inside our heads to do every single thing. However, you need to realize that you’re just like other humans and you cannot do it all.

So, it’s okay to say no to late-night parties and have a deep sleep meditation instead. You don’t have to keep saying yes beyond your capacity of doing things and you’re worthy of saying ‘no’.

  1. Practice gratitude journaling

If you’re looking for doing some mindful activity this V-day then journaling is your best friend.

While chasing life’s achievements, we usually forget how blessed we’re for having everything we desired. This is your time to sit in peace and appreciate all the little things in life. Be grateful for your own self as well. You have come far and are so worthy of celebrating your journey.

Make a list of all the things you’re grateful for and write a little note of gratitude for yourself. Not only will this make you feel good in the moment, but with continued practice, it can improve your overall mental health.

In the end, may this V-day remind you to spend some quality time with yourself by showering much-needed love and care. And don’t forget to treat yourself to your favorite meal and a glass of wine (if you partake). 

I hope that these self-care activities show you the path to practice the art of being with yourself and living a stable life.

On The Go Makeup

On The Go Makeup

Sometimes, it’s not always necessary to put on makeup, while other times a full face is important. And other times, time doesn’t allow for a whole production, so on the go makeup is one of my favorite things to do, even when I have time! I have perfected a 5-10 minute on the go makeup routine, and I wanted to share that with you in hopes it helps you realize you don’t always need to take forever to be put together.

On The Go Makeup

In all honesty, for on the go makeup, I use about 3 products from my makeup bag. They are the best products for giving coverage, quickly applying, super easy, and make my skin tone look even. I struggle with dark under eyes, and hard cheekbone that leave me looking less feminine when I don’t wear makeup.

As always, this blog post contains affiliate links, but all opinions are my own. If you click on those affiliate links, I get a small commission that lets me continue doing this for you 🙂 

Primer/Concealer

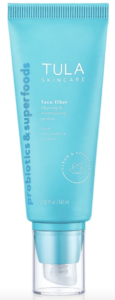
When I am on the go, I want very few products in my purse, but also ones that willOn The Go Makeup - Tula Primer get the job done. I recently found an overall primer/concealer that blurs my skin tone so anything that’s out of the ordinary will not show through. It’s the Tula Face Filter. It is a blurring and moisturizing primer that works double time when you don’t want to wear makeup, but want to use moisturizer. It also works under a heavier foundation as a moisturizer. Here is the link for the 2 oz size, but it also comes in a 1 oz size.

This product is great for any and all skin types and tones, and makes it look like you have an Instagram filter on your face effortlessly and with very little product.

Under Eye Brightener

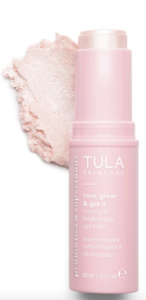
Tula Rose Glow & Get It Cooling & Brightening Eye BalmNext, because I want and need to brighten the dark circle under my eyes (thanks dad and dehydration 🙁 ) I do have a few different products depending on the day and occasion for the makeup, but the first one doesn’t require a sponge or any contouring. It provides the least amount of coverage, but works when I need to get out the door asap. The product is Tula Rose Glow & Get It Cooling & Brightening Eye Balm. I like this product because you just pop the cap off, twist up to show product, swipe under both eyes, and then rub/pat in with fingertip.

On The Go Makeup - sculpting concealer

Under Eye Concealer

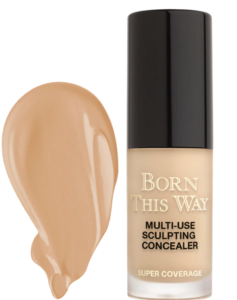
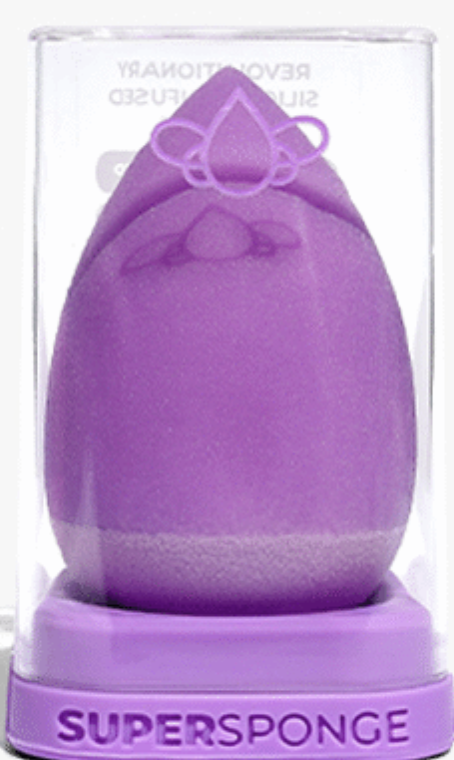
The next product I prefer if I want a little more coverage, or if I’m shooting some photos or going to an event. It gives way more coverage and adds a brighter under eye. You need a sponge to blend this one in, and I HIGHLY recommend theSuper Sponge. Super Sponge is a silicone sponge that allows you to use less product and lets you swipe instead of bounce when blending. The under eye brightener/concealer I love for this is by Too Faced and it’s the Born This Way product. I use the Shortbread shade which is close to the Natural Beige, and here’s the travel size to give a try. This is a must have in your makeup kit for either on the go makeup as well as for a full longer makeup routine.

And one of the best eye brighteners on the market, that you’ve heard every blogger talk about is the Shape Tape by Tarte. Not going to lie, I do love this option because I like to blend their colors together to make a custom blend. Sometimes I also layer this one over the Too Faced concealer or on other spots on my face when I have a blemish. I use Tan Sand and Light-Medium shades depending on the time of year, and how much I see the sun. Tarte often has a sale and the Shape Tape is always included, so that’s another reason the blogging and beauty community love it so.

Eye Shadow Palette, Brushes, and Eye LinerOn The Go Makeup - eyeshadow brush

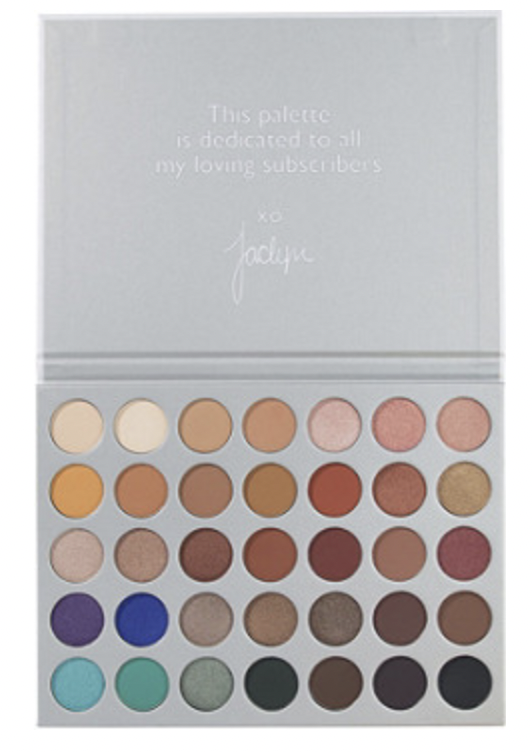
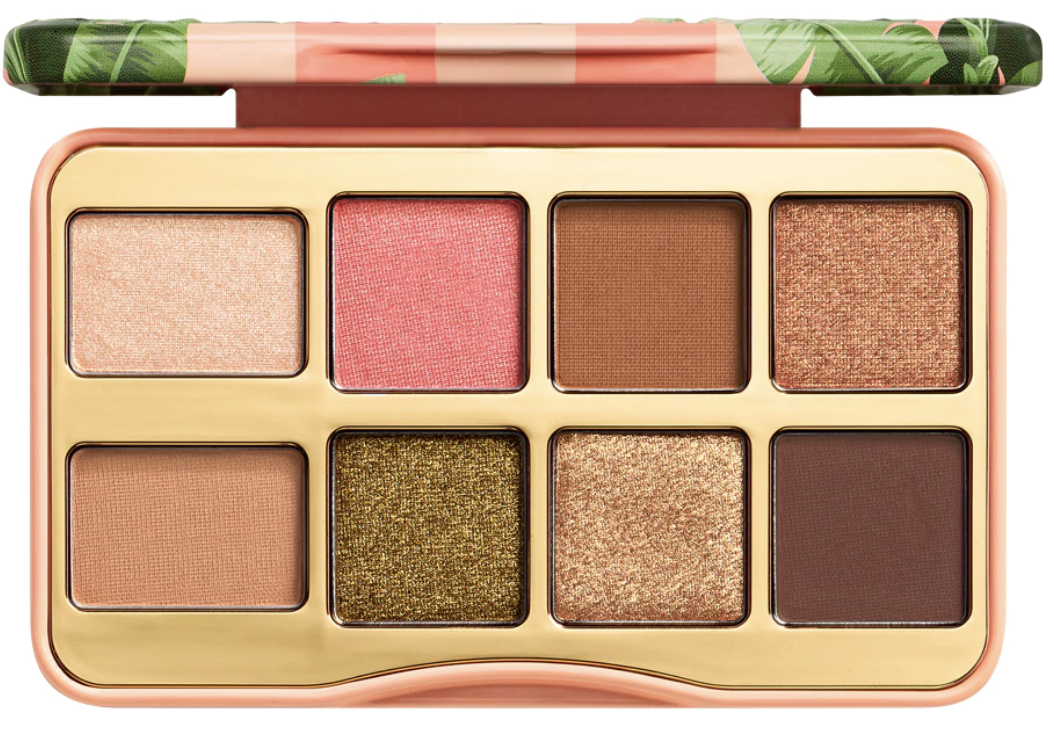
The next thing I do in my on the go quick and easy makeup routine is my eyes. If I’m being honest, I literally only do 2 colors, use 2-3brushes, and blend them together. I do a lighter color below my eyebrows to highlight and then a darker color over my eyelid and then use a Mac 217 brush (which everyone needs in their makeup bag no matter how often you do your makeup). The tip and trick here is to blend with the 217 brush AFTER EVERY color you apply. You then blend the bottom color upward into the color above it (regardless of how many colors you have on your eye) and this helps to create a subtle crease.

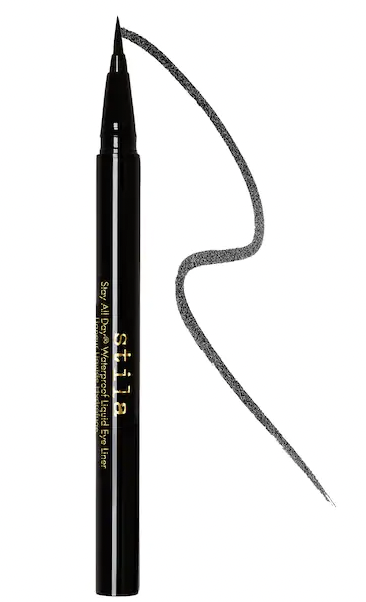
I will share some of my favorite palettes below as well as the color I use most for these to quickly apply to the eyes. The next thing I do is add a quick line from the center of my eyelid to the outer crease adding a liner. I do the same for the bottom lid and it gives a little more ump to wake up the eye. I always use black liner, but you could easily use any color. One thing I do is always make sure to curl my eyelashes before applying mascara.


If I want to do more than 2 colors, it easily takes 5-10 minutes only for the eyes, but if I’m doing the method above, I can get it done in under 2 minutes with the eyeliner and mascara.

LipsOn The Go Makeup - tarte lip rescue

The very last thing I do for my makeup routine is putting something on my lips. Usually, because I live in the super dry desert, it’s a lip gloss.My favorite lip gloss that also adds moisture is the Tarte Quench Lip Rescue. It comes in nearly 20 colors, including a clear. My two favorite are Rose and Coral. I like that it adds a bit of color to the lip as well as adding hydration to you can feel when your lips are super dry. It has a cooling feel as well as a little tingle.

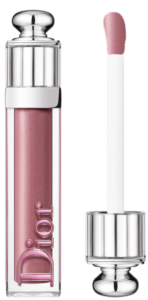
On The Go Makeup - dior stellar glossIf I want something with a bit more color and sheen, I grab my Dior Addict Stellar Gloss which is a plumping shine and gives 24 hour hydration. This gloss I’ve been using since 2010 and it only keeps getting better with time! The color names and numbers have changed over the years, but now I use 785 which is called Diorama. When I started using this gloss in 2010, the number was 157 and the name was Reflect.

This is the best routine and easiest for me to get out the door, apply in the car, do at home, or in a public bathroom when traveling which makes the biggest impact. It hits all the important areas for me like lip and cheek, and makes me feel confident. And, the last thing you need, if you are like me, are extra things in your bag taking up space. These are the best products to quickly apply and keep in your purse for on the go.

Easy Makeup Removal Product

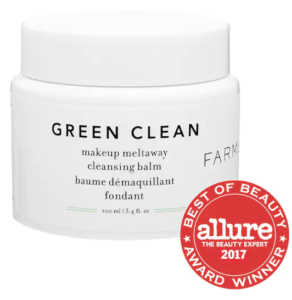
So this wasn’t part of the on the go makeup routine, but I wanted to include my favorite product and way to easily and quickly remove yourOn The Go Makeup - green clean cleansing balm makeup, either a fully contoured face, or simple on the go makeup. I try to be as clean beauty as possible, and sometimes that happens and sometimes not. This product, however, is a clean beauty product I picked up at Sephora, and love! It’s the Green Clean Makeup Meltaway Cleansing Balm from Farmacy.

To use this balm, you grab a small amount from the container rub in your hands to warm, and rub all over your dry makeup filled face. Keep rubbing until it starts to feel slippery on your face. I like to rub over the lips, down the neck, and over my eyes and eye lashes. I use a washcloth with warm water to rinse. This is the easiest and quickest way to remove makeup while also doing good for the environment by not adding more waste to the landfills with wipes.

On The Go Makeup Kit Routine Products

I know I listed some of the products above, but I wanted to make sure you have links, and colors I use. Some of the products I have had for a long time, so the names and numbers may have changed, but the quality of product is still the same.

I gave you all of the links and colors above for everything before the eyes. These photos and descriptions will give you the exact product and how I use them.


For the on the go makeup, I use the top two colors (the lightest ones at the top left, then I use another light to medium color for the lid). This is by far my most used palette of all!
This is a perfect on the go palette because it has all the neutral basics with a bit of shimmer and a mirror to assist in a pinch.
The quickest and easiest sponge to blend and use with your concealer under the eyes or anywhere on the face.
All time favorite liner because my not so steady hands always get a straight line that’s not going to go anywhere, even when I get emotional!
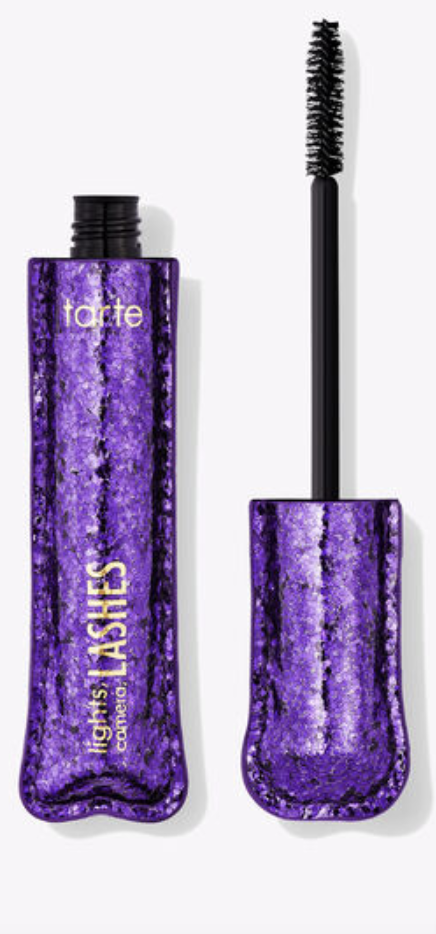
I love using this mascara when I want to add some volume and fullness to my lashes while keeping the rest of my eyes minimal.
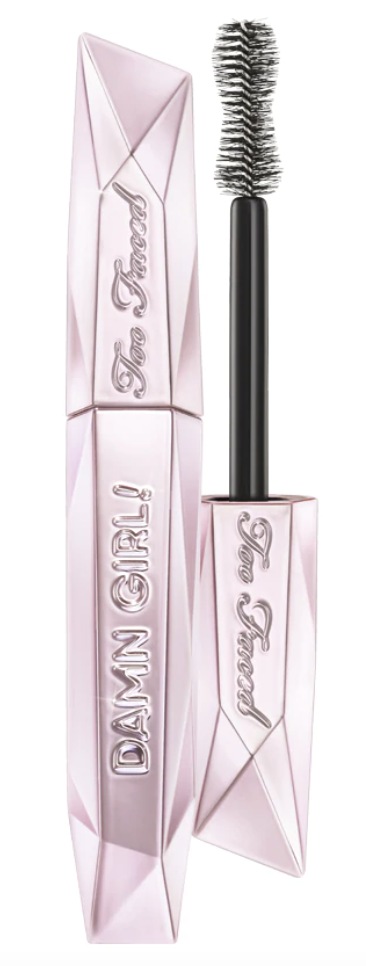
When I want to fell more awake and make my eyes appear bigger, this is my go to. It doesn’t clump and instantly makes a big difference.
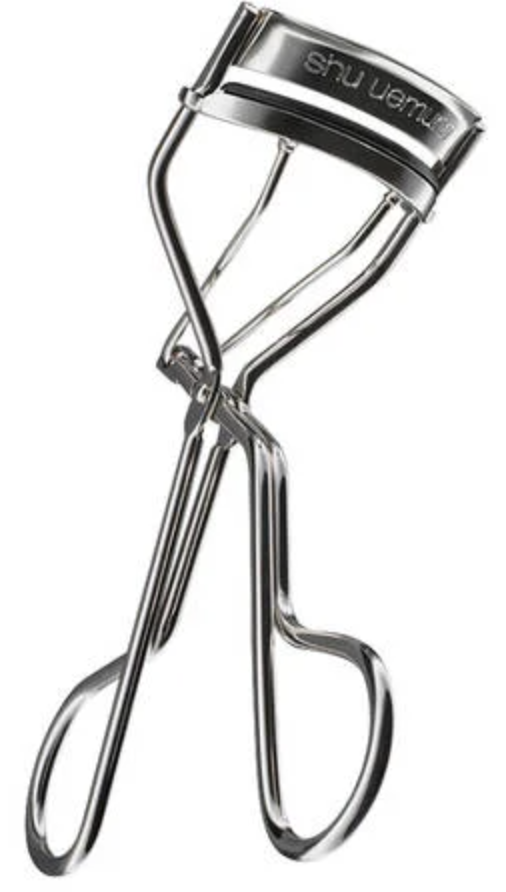
My ole faithful I’ve had since about 2011 when I barely knew how to curl my eyelashes the right way! This thing is magical and creates a curve like no other.
The Ultimate Guide to Cleaning Out Your Closet: Tips, Tricks, and Benefits

The Ultimate Guide to Cleaning Out Your Closet: Tips, Tricks, and Benefits

Closet cleaning is one of those tasks that we all know we should do, but somehow never seem to get around to. How many times have you opened your closet door, only to be overwhelmed by the mess? It’s time to change that! In this blog post, we will discuss the importance of regularly cleaning out your closet, and provide tips on how to make the process easier. We’ll also talk about some of the benefits of having a decluttered closet, such as being able to find what you want quickly and easily, looking great with minimal effort, and having more space in your wardrobe. So read on for helpful advice on how to finally clean out your closet!

The Ultimate Guide to Cleaning Out Your Closet: Tips, Tricks, and Benefits

1. The Importance of Cleaning Out Your Closet

Do you ever feel like your closet is a black hole that just sucks in clothes? You’re not alone. Most of us have way too much stuff crammed intoTips for Easier Cleaning our closets, to the point where it’s hard to find anything. That’s why it’s so important to clean out your closet regularly. Getting rid of clothes you don’t wear anymore can make a huge difference in the amount of space in your closet and how easy it is to find the clothes you need. Trust me, there are lots of benefits to cleaning out your closet!
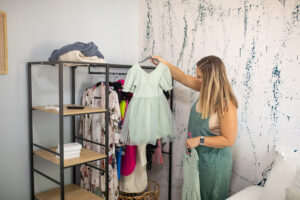
Cleaning out your closet may seem like a lot of work, but once you get started it’s not so bad. And the benefits are worth it. So what are you waiting for? It’s time to get organized!

2. Tips for Easier Cleaning

So you’ve decided it’s finally time to clean out your closet. But where do you even start? And what are the benefits of getting rid of all that stuff you never wear? Here’s a quick guide to help you get started.

The first step is to take everything out of your closet. Yes, everything. Once it’s all out in the open, you can start sorting through it. Make three piles: keep, donate, and trash. For the keep pile, ask yourself if you’ve worn the item in the past year. If not, it probably goes in one of the other two piles. The donate pile is for items that are in good condition but you just don’t wear anymore. And the trash pile is for anything that’s damaged beyond repair.

Now that you’ve sorted through everything, it’s time to put it all back. Start with the keep pile – these are the items you want to keep in your closet. Then move on to the donate pile – find a box or bag and put them aside to donate later. And finally, get rid of the trash pile – either throw it away or recycle whatever you can.

When you’re done, take a step back and admire your work! A clean and organized closet can make getting ready in the morning a lot easier – and it’ll give you a lot more space too. So next time you’re feeling overwhelmed by your closet, remember this guide and take some time toBenefits of a Decluttered Closet clean it out. You (and your wardrobe) will be glad you did!

3. The Benefits of a Decluttered Closet

Clearing out the clutter can be a daunting task, but it’s worth it. Not only will you be able to find things more easily, but you’ll also feel lighter and less bogged down by excess stuff. Here are a few benefits of decluttering your closet:

– You’ll be able to see what you have. When everything is crammed into your closet, it’s tough to take an inventory of what you own. By decluttering, you’ll be able to see what items you wear regularly and which ones you can live without.

– You can set rules for what stays and goes. One of the best things about decluttering is that you get to decide what goes back into your closet and what doesn’t. Maybe you only want to keep items that you’ve worn in the past year or that fit your current style. Whatever rules you set, make sure they work for you.

– You can identify items that need to be replaced. Decluttering is also a great opportunity to assess the condition of your clothing. If you have stained items, ripped, or otherwise in need of repair, you can either fix them or get rid of them. And if there are items that you love but don’t wear often, consider storing them elsewhere so they’re not taking up valuable space in your closet.

By following these steps, you’ll be well on your way to having a decluttered closet that works for you. So roll up your sleeves and get started!

4. What to do with the items removed from your closet and what’s left

Getting rid of clothes you don’t wear anymore can save space and help you define your style. But what do you do with all the clothes you’reThe Ultimate Guide to Cleaning Out Your Closet getting rid of? Here are some options:
– If the clothes are in good condition, you could sell them at a consignment store or online.

– If the clothes are in poor condition, you can donate them to a local charity.

– And if you want to keep the clothes but they’re taking up too much space in your closet, consider storing them in bins under your bed or in another out-of-the-way place.

Whatever you do with the items you remove from your closet, the most important thing is that you end up with a closet that feels good to you. So take your time, be ruthless, and don’t put anything back that doesn’t make you feel happy and confident. Good luck!

Working Out But Not Eating Enough

Problem Eating: The issue most women don’t realize they have.

Until my trainer put me on the scale and did my body composition information and dug into my eating habits, I had no idea I have a problem eating.

Problem Eating: Working Out But Not Eating Enough

Not that I have a problem eating and then purging, or that I binge. Rather, I don’t take the time or really care about making the food. I didn’t grow up with a parent who cooked with spices or flavoring. I just knew it was something that I needed to do, basically to live.


That carried on to adult life. Most days, if it gets past 6:30 pm and I haven’t eaten. I will just say I’m not going to eat. Even if I didn’t eat more than one time that day. With a to-do list that most people have no idea how I do it, and more and more being added by the day, eating and eating enough was always pushed to the end of the list.


There were and sometimes still are, days where I would get lightheaded with low blood sugar, my body temperature would be off, and I would feel like I was going to pass out. Would that make me eat?


NOPE.


I would instead grab a coffee or a highly sugared drink and drink that to help me get through.


It’s no wonder that when my trainer told me to eat more, it freaked me out.

Not the fact that we were going to work out 3x minimum a week.

The idea of intensity exercise did not scare me. In order to build muscle mass and lose weight, physical activity is necessary.

Not that I was going to gain muscle and reduce my body fat.

In order to achieve my weight loss goals, I knew that I might need to start watching my calorie intake, avoiding high levels of sugar, and getting my metabolic rate back on track. Sort of like a female athlete. Still, this was not what freaked me out the most.

NOPE.


I was terrified of how I was going to find the time and energy to be able to eat to feed my muscles and body so I could work out. I was terrified that I wouldn’t be able to find anything that I could throw in my bag that would work on the go. Terrified of having to cook and fix meals daily instead of meal prepping. One day a week like I’d done in the past. Would I be able to make time? Would I lose muscle / progress if not? So many questions running through my mind.

Bullet Journal Food Tracker

But, I knew I needed to make the change. So I agreed to do it. I kept a food journal of food intake like we had to do in high school for FACS class. And put times and what I ate. In the beginning, I put in the ounces or quantities very strictly.

I needed to prove to myself that I could do it.


The first few days, I felt so full and almost sick to my stomach for how much I was eating. It felt like my body was rejecting all of the food. Because I had it on starvation mode for so long. After a few days, my metabolism started picking up. I spent a ton of time I didn’t have and still don’t, in the bathroom and my body would actually get hungry.

Looking at this now, a month in, I realize that I’m showing my girls how I react to food as an adult. I know that now, they are fine eating, and eating ALL THE TIME. But I was probably the same at their age. If I don’t change my mind and attitude about food and eating, I could be creating trouble for them down the road.

Which is why I’m so glad I’ve taken the necessary steps now. When I can, to get this under control.

I keep a daily food diary and try to stick as close to the times as possible so I can keep my body on a schedule. But sometimes I get off. I’m also doing my best to ensure I’m eating enough food, and that I eat as much fresh and plant based as possible to full my body properly. I’ve learned that hydration is key. I drink a minimum of (3) 40 oz Hydro Flasks a day and try to get in a coconut water or two as well. The weight surprisingly is coming off and I’m eating more than when I was/have been in the past year.


I’m excited to see where this goes.

But my hope is more than anything that I don’t fall back to the old ways of not making time to eat. I’m hoping that I learn a few easy recipes and tricks along the way to share here. Because we can all use something to simplify our lives.

If you are interested in working out with my trainer or doing things from home, you can visit their Instagram and sign up for the Live classes they are offering. Visit their link HERE.

Work Life Balance Problems And Solutions

In her article for the New York Times, Nicole Sperling argues that the vast majority of women in the United States feel like they are falling behind in both their personal lives and their careers. While the proportion of women in the workforce has increased dramatically in recent years, the number of women in high- profile jobs has actually declined. And, as more and more women juggle full-time careers with family responsibilities, they are struggling to keep up.

According to Sperling, this “work-life balance” is a major health condition for women, and one that is often overlooked. menstrual cycle, The gender gap is also an issue when it comes to health care. In her article, Sperling cites a study that found that only 39 percent of women said they had access to ob-gyn care, compared to 78 percent of men. This disparity is particularly troubling given that breast cancer is the leading cause of death among women in the United States. Clearly, there is still a lot of work to be done when it comes to women’s health. However, Sperling’s article reminds us that the issue is complex and multifaceted. By raising awareness about the unique challenges faced by women today, we can begin to address them and bring them to light.

DIY Door Curtain

DIY Door Curtain

DIY Door Curtain

If you are like me, you usually find the perfect curtain in the most wonderful print or color but the length is wrong. No matter how many times you measure your window.

I always find the most amazing curtain that’s either too short or too long.

Never the right length.

Add in custom french doors and custom windows and the length will never be found in stock in a store. I wish our dining room was standard sized, but without looking standard.

So without needing to raise or lower the curtain rods every time you want to change the curtains, or putting a drop hem in by sewing the curtains, I came up with a better solution. Custom curtains.

DIY Door Curtain

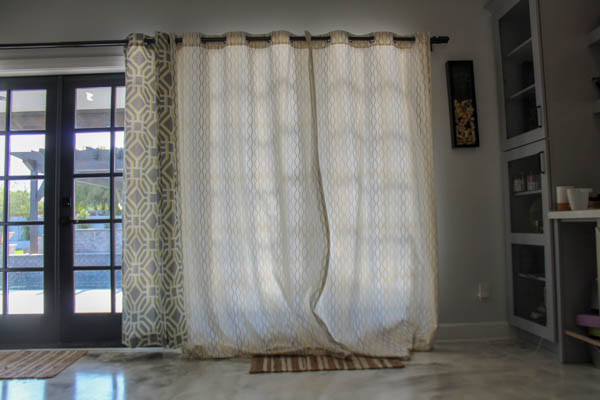
I bought too long of curtains.

Well, I didn’t intend for them to be too long when I purchased, but it happened. 

I had a really full cart already with 2 kids at Ikea and they were an impulse purchase, but one that I really liked. But in all honesty, I don’t ever mind a DIY project either. 

Making the mistake to go to Ikea on a Sunday was the first issue. It was full of people and my Mom radar was on super high as I didn’t want anyone to steal them when I was too busy looking at the length of the curtains too long.

So I grabbed the first 3 panel curtain packets I saw, and went with it. These are the ones I grabbed. 

I also thought that our windows and doors were at least 96 inches long… not remembering that we had custom heights for them making them take longer to get in during construction. (I don’t know how I could forget that)

Anyways, I got the curtains home, put them up, and realized that they are a good 8 inches too long…

I did what every person would do.

Contemplated taking them down, raising the curtain rod, and sewing them. We have to have a window treatment for the french doors that lead from the open concept kitchen and living room so these door curtains weren’t negotiable.

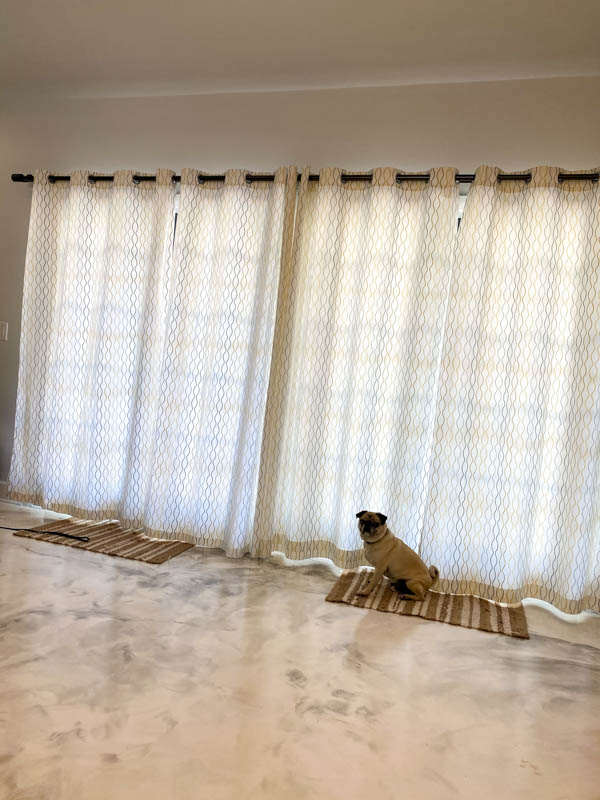
I also put up another set of curtains panels which are 64 inches and you can see in the photo they are too short.

Taking them down isn’t an option since we wanted to watch tv without a glare and shutting out the light at night. 

DIY Door Curtain hack

DIY Curtains Without Sewing


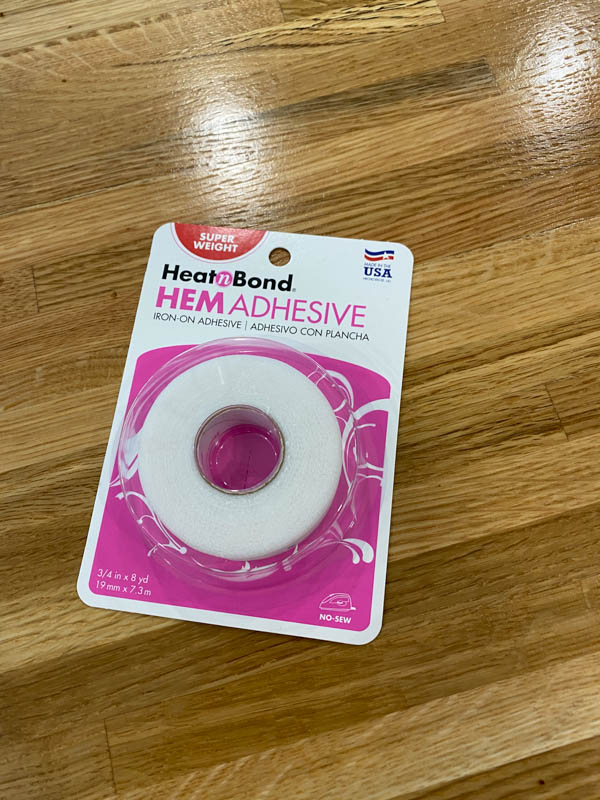
hem adhesive

Raising the curtain rod also entails fixing the drywall and having it repainted.

Both things we’ve done about 100 times now it feels like in this process. And it’s more expensive than purchasing all new curtains – so that’s also out.

With the pandemic happening and stay at home orders in place, taking them to get hemmed professionally are not options.

So, I took to Amazon to see if I could find some double sided fabric tape to make it work.

And thank goodness Amazon came to the rescue! The tape arrived in 2 days and I set out to fix them up using a diy no sew method. I have about 8 inches to hem to make them barely drag the floor, which I think will be fine.


Personally, I believe this will work with any curtain length – valance, kitchen curtains, cafe, longer curtains, etc.

Two rolls of this tape from Amazon should do the job. If you have fewer curtains, you may need less. If you have more, see how many it will take. Other options were available, but the shipping time was longer, and we couldn’t stand the curtains being so long anymore. Here’s my step-by-step process.


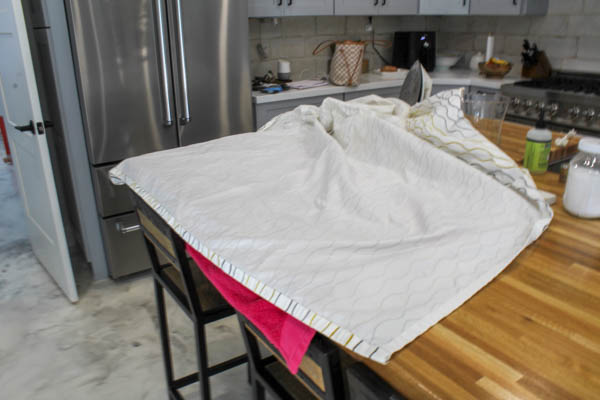
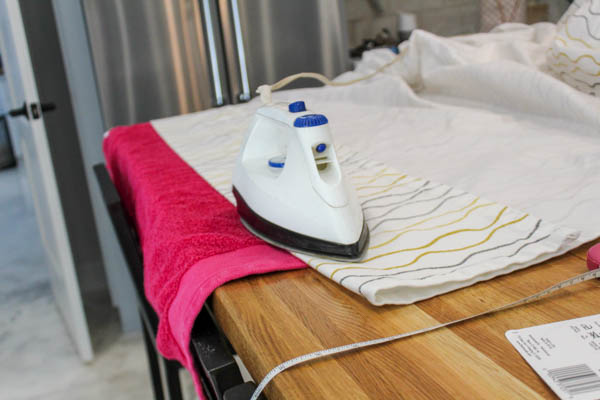
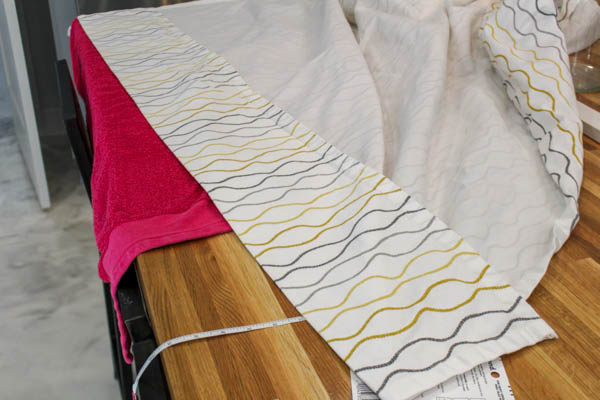
I simply laid the curtain across our countertop and put a towel under it to ensure I didn’t damage the butcher block. I moved the top edge out of my way in order to protect it as well. You can also fold the top to move it out of the way. If you have an ironing board, that probably works better. We don’t, so I improvised with what I had on hand.


DIY Door Curtain tutorial
Make A Curtain work for Any Window or door

And the other thing you need is an Iron. We borrowed one from my Mother In Law because we only have a steamer for our clothes. 

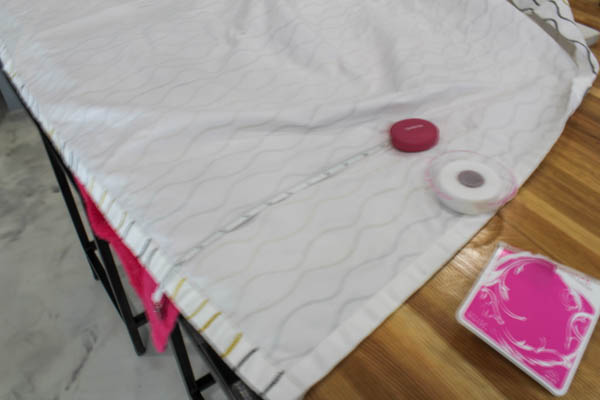
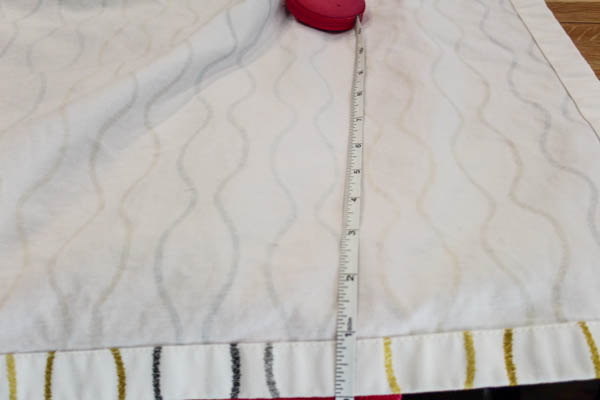
I measured out how far I wanted to bring the curtains up from the bottom hem. In my case, that was 8 1/2 inches. I put the tape at about 7 inches so I could fold the fabric, iron, and cut a new hem. I made sure to measure from the top and bottom to ensure a straight cut on the raw edges.


After cutting the hem and realizing how much new fabric was left on the folded edge, I decided to cut the new line so it wasn’t as thick looking when hanging. I reduced the edge of the fabric to just a few inches.

Make A Curtain work for Any Window or door
ironing curtain
Adjusting curtain length
DIY curtain hem

Final Product: Perfectly Fit

The final product is a curtain that’s not dragging the ground and custom fit to your door/window!

I will play around with the lengths as our floors aren’t completely level. For me, each door and window will need a different length.

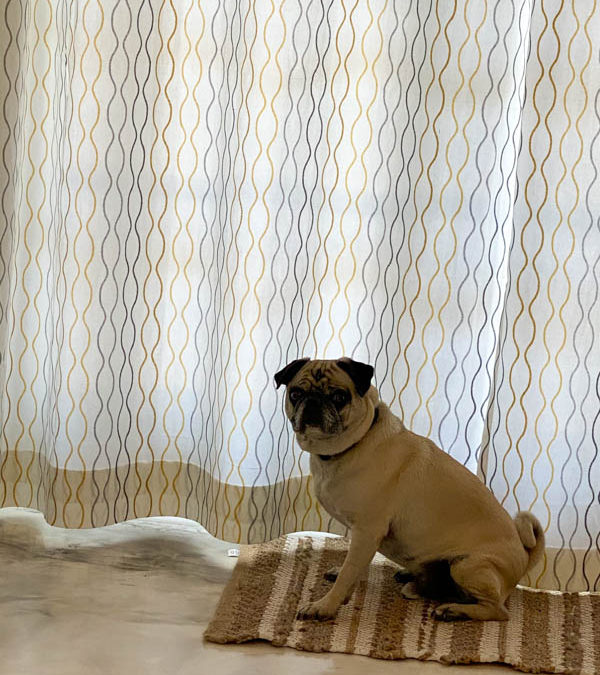
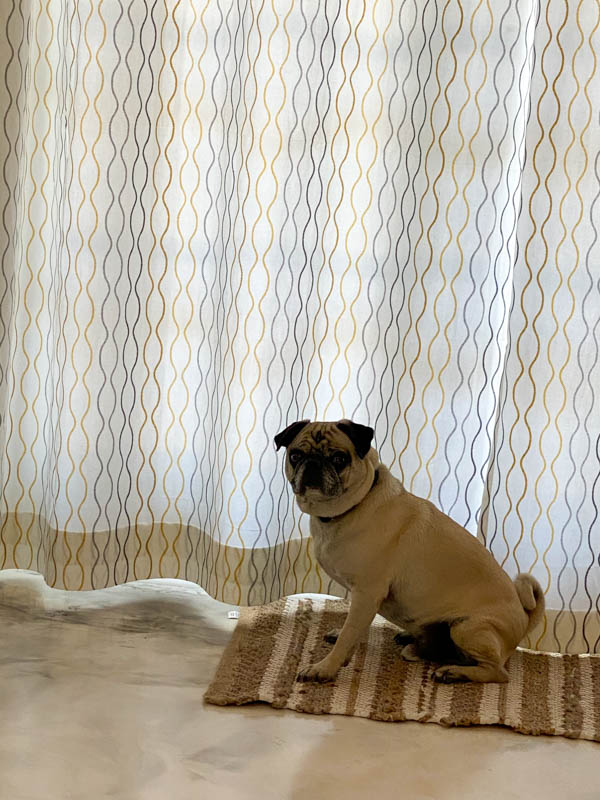
One note – cute doggie not included 🙂 

Another note, my hubby decided he wanted to help with the project and didn’t heed my instructions to cut the extra fabric, which I did mention above, and you can see the reason. Look at Champ’s face and front area versus where is tail is. The extra fabric is a bit crazy!


If you don’t want to mess with curtains and you for sure don’t want to whip out the sewing machine, you can always check out window film as an option for a window covering. I have used window film on other properties that you can tie into the home decor. They work great as DIY curtains that don’t need washing, don’t ever get dirty, and don’t have a stretched rod pocket. 


pug by the curtains

Hopefully this is something you find helpful and useful in your home when doing projects or redesigning your space.

Let me know in the comments if you have other ideas to make a curtain fit a space you have.